
Custom domain
When you created and published static website maybe the first thing that you would notice is the
url. Default gitlab's url for your website should look something like this https://your_login.gitlab.io/project_name
Of course it is totally fine to have this website url, but if you want to customize it let's go and do it together.
Step 1: purchasing actual domain name
Yep, we need to have the domain name that will be used to point to our static website. The easiest way is to go to such sites as GoDaddy or NameCheap and buy whatever you like. It would be nice to do some overview of the available names before buying them - it is a big and really serious topic to discuss, especially if you want to compete for good ranks in search systems. But in this article we will discuss only the technical side of this question.
Step 2: adding DNS record
So let's assume that we bought the domain name on Godaddy. Then the next step is to link this
domain name to already deployed website: we need to add DNS record.
DNS - is domain naming systems which can be considered as mapping mechanism between human
readable website name and ip address or other website name. Adding DNS record means that we are
adding this domain name and associated ip to the system:
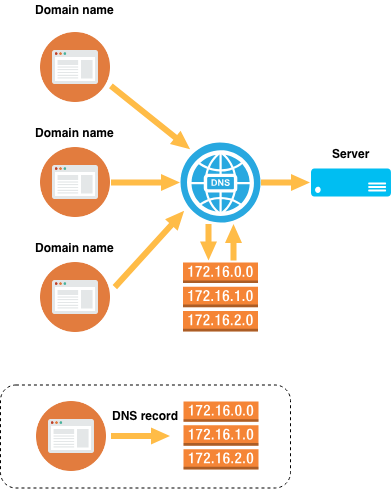
As you can see from the schema we can have multiple domain names associated with one IP address, but in our case let's deal with one.
So let's add A record (which stands for Address record) in goDaddy console:
- open goDaddy console
- go to MyProducts -> in domains choose you website -> click DNS
- click on Add button in
Recordschapter - add A record like this:
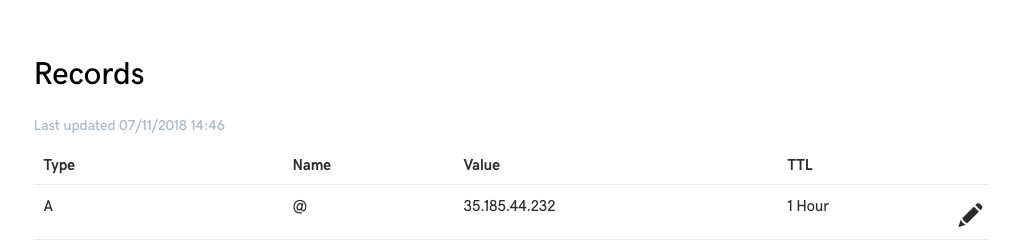
Here @ stands for whole domain. IP 35.185.44.232 is the current IP of gitlab pages. TTL is time
to live.
So we have to replicate exactly the same A record in our goDaddy manage console.
Step 3: adding domain name in gitlab
So far we finished only mapping only in DNS system, but gitlab does not know that it has to
redirect all requests to your website. To fix this we have to go to Settings -> Pages. There we
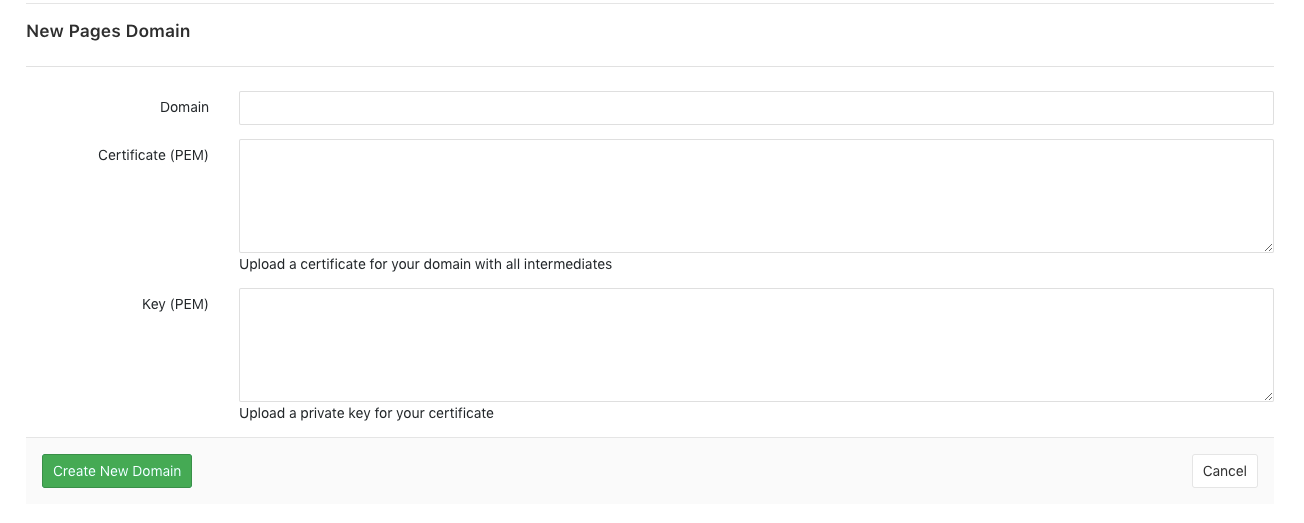
find New Domain button like this:

Then we have to fill in only Domain field with our custom domain name and click Create New Domain
button
After that we will see another form like this:

Here we have to copy value of Verificatoin status field and return to our goDaddy console.
In goDaddy console we need to create TXT record and paste there value from Verification status:

After that we go back to gitlab console and click Verify button - if everything is done right
we should see notification that our domain name is verified.
Step 4: Try to use your custom domain name
This is the final step - just enter our domain in browser address field. Should work, if not - wait for some time and try again.
Conclusion
Adding your custom domain is relatively easy. You can find details about enabling custom domain for gitlab pages in gitlab docs

You May Also Enjoy