
The initial idea and setup
What do you think when you hear lambda function? If you developed few of them you probably know already that lambda functions supposed to be a piece of light-weighted code that will be run inside some random aws server. It is really cheap and suppose to be easy to use.
Usually such languages as nodejs, python are used for writing lambda functions because they are light-weighted, easy to write and fast. But from my perspective the biggest disadvantage of writing lambda using this languages is absence of strong typing. Usually you work with raw objects and you have to keep track on their fields and type and nullability. Another problem is that documentation (again from my perception) is a bit hard to follow.
At the same time aws provides possibility to use other languages like java. With java, especially with java sdk 2.0, writing lambda functions becomes easier, mostly because now you can see and use argument types and return types, although documentation is still not so easy to follow. Apart of that we can use kotlin to write fast and readable code with addition to default features of this language.
The idea of this article is to build lambda function using kotlin.
Requirements:
- kotlin
- aws access (in the web console and in using cli tool)
- gradle
Let's start implementation
The code that will be discussed here can be found in this repository
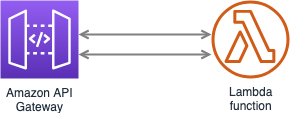
The architecture of this lambda function will be the one which is widely used: aws gateway connected to aws lambda. So for us it will be just an endpoint deployed somewhere.
Let’s configure our build.gradle file. We will use kotlin dsl in it, so the extension of this file is kts.
import com.javarubberduck.awsplugin.AwsPlugin
import com.javarubberduck.awsplugin.AwsPluginExtension

plugins {
    kotlin("jvm") version "1.3.50"
}
apply<AwsPlugin>()

group = "com.javarubberduck"
version = "1.0-SNAPSHOT"

buildscript{
    repositories {
        mavenLocal()

        dependencies {
            classpath("com.javarubberduck:aws-plugin:0.1-SNAPSHOT")
        }
    }
}

dependencies {
    implementation(kotlin("stdlib-jdk8"))
    implementation("com.amazonaws:aws-lambda-java-core:1.2.0")
    implementation("com.amazonaws:aws-lambda-java-events:2.1.0")
    testImplementation("org.junit.jupiter:junit-jupiter-api:5.3.1")
    testRuntimeOnly("org.junit.jupiter:junit-jupiter-engine:5.3.1")
}
repositories {
    mavenCentral()
}

tasks.test {
    useJUnitPlatform()
}

java {
    sourceCompatibility = JavaVersion.VERSION_1_8
    targetCompatibility = JavaVersion.VERSION_1_8
}

configure<AwsPluginExtension> {
    s3BucketName = project.name
    profileName = "personal"
    templatePath = "./resources/sam-template.yml"
    stackName = "kotlin-lambda"
}
You can see that we are using:
- aws libraries that bring types and services into your lambda
- aws plug-in which we will discuss in the next article. For now we only need to know that this plugin allows us to deploy cloud formation script.
Also we can see that java plugin is configured with sourceCompatibility and targetCompatibility which is needed for
creating code which is compatible with java version 1.8 (this version is supported by aws). This is the main point in this
article that you can easily write code in kotlin using all it's features and at the same time be compatible with aws
limitations.
That’s it. For this simple lambda function we don’t need any complex dependency.
Let’s write the code of our function. In kotlin projects, our code might be placed in the kotlin folder. The only class that we have here is handler which receives apigateway requests and replies with apigateway response. The only logic here is to send back hello word like message.
package handler

import com.amazonaws.services.lambda.runtime.Context
import com.amazonaws.services.lambda.runtime.RequestHandler
import com.amazonaws.services.lambda.runtime.events.APIGatewayProxyRequestEvent
import com.amazonaws.services.lambda.runtime.events.APIGatewayProxyResponseEvent

class HelloWorldHandler: RequestHandler<APIGatewayProxyRequestEvent, APIGatewayProxyResponseEvent> {
    override fun handleRequest(input: APIGatewayProxyRequestEvent?, context: Context?): APIGatewayProxyResponseEvent {
        val message = "Hello javarubberduck world"
        return APIGatewayProxyResponseEvent().apply {
            statusCode = 200
            headers = mapOf("Content-type" to "text/plain")
            body = message
        }
    }
}
That's it, the logic is ready.
Cloud formation template
Right now we have to specify cloud formation template that will be used to deploy our code to aws. In our case we need to create api gateway and lambda function with our code inside.
{: .notice--info}
For those who does not know what cloud formation is : it is amazon service that allows to deploy other amazon web
services using description of written in json/yaml file. According to this template (you can treat it as a blueprint)
AWS will create stack of components.
Let's take a look at the template. You can find it in the repo in ./resources.
{: .notice--warning}
I don't want to pack this template with the source code which will be deployed to aws because it is not needed there.
That is why it is better to leave the template outside of the src folder.
AWSTemplateFormatVersion: '2010-09-09'
Transform: 'AWS::Serverless-2016-10-31'
Resources:
  KotlinLambdaFunction:
    Type: AWS::Serverless::Function
    Properties:
      FunctionName: kotlin-lambda
      Handler: handler.HelloWorldHandler::handleRequest
      Runtime: java8
      CodeUri: ./build/libs/kotlin-lambda-1.0-SNAPSHOT.jar
      Description: Hello world lambda written in Kotlin
      MemorySize: 512
      Timeout: 2
      Events:
        ApiGateway:
          Type: Api
          Properties:
            Path: /messages
            Method: GET
As you can see there is line Transform has value AWS::Serverless, this means that we are using SAM (serverless
application model). I consider sam as a wrapper on top of usual aws-cli, in some cases it makes deployment process
easier then using traditional cloud formation template and aws-cli.
For example: we would like to create lambda function with api gateway. In case of traditional cloud formation template
have to create separately lambda function, api gateway, deployment of the api gateway, but in case of sam template
we can write the same in concise manner.
Deployment
In order to deploy our lambda to aws we need to do the following (assuming that you have aws access already):
- build
fatjar which basically means pack all the dependencies together with the source code - package lambda - using
sam packageoraws cloudfromation packagecommands we can create archive out of our code, put it in s3 bucket, replace jar path in our cloud formation template with the s3 link - deploy the stack to aws - using
sam deployoraws cloudformation deploywe can create the stack in aws and deploy components described in this stack
{: .notice--info} Cloud formation stack is the set of real components that are deployed using cloud formation template. So if cloud formation template is a blueprint then stack is the object created using it.
Deployment validation
In order to check our deployed application we have to:
- grab the url (can be find in AWS web console -> api gateway -> stage)
- make get request to /message endpoint. It has to reply with "Hello javarubberduck world"

You May Also Enjoy