
Making your static website more dynamic
One of the first things I was interested after this blog was started is how to add comments section to the articles. Because without comments and your opinions it would be just a talk to myself.
But we have a static website which means every content here shouldn't be dynamically changed. So from the first glimpse this idea looks like not very viable. Hopefully we have the solution which adds dynamics to our static website.
What are different variants to have comments
Actually there are a lot of service that provides such functionality.
The most simple way - you can just easily add the link to your thread in Twitter or Reddit.
The advantages:
- you don't have to care a lot about how it works
- you have all features those services provide
The disadvantages:
- your site won't have proper comments section
- you won't be the owner of the comments data.
The other way is to use 3rd party service that embeds comments functionality using scripts. For example Disqus, Facebook Comments, or JustComments.
The advantages:
- you don't have to care a lot about how it works
- you have a lot of features those services provide
- your website will have nice comments section integrated in your web pages
The disadvantages:
- you are not the owner of the data
The third way is to run your own instance of the comment service. A few of them are: Commento, Schnack, Discourse.
The advantages:
- your website will have nice comments section integrated in your web pages
- you is the owner of the data
- your website will have nice comments section integrated in your web pages
The disadvantages:
- you have to host the solution
For now I decided to go for Discuss because I don't want to deal with self-hosted services and I want to make good looking comment section on a web page.
What is Disqus and how does it work
Disqus is a service that provides comments functionality by providing script for showing comments section and for storing comments on their backend system.
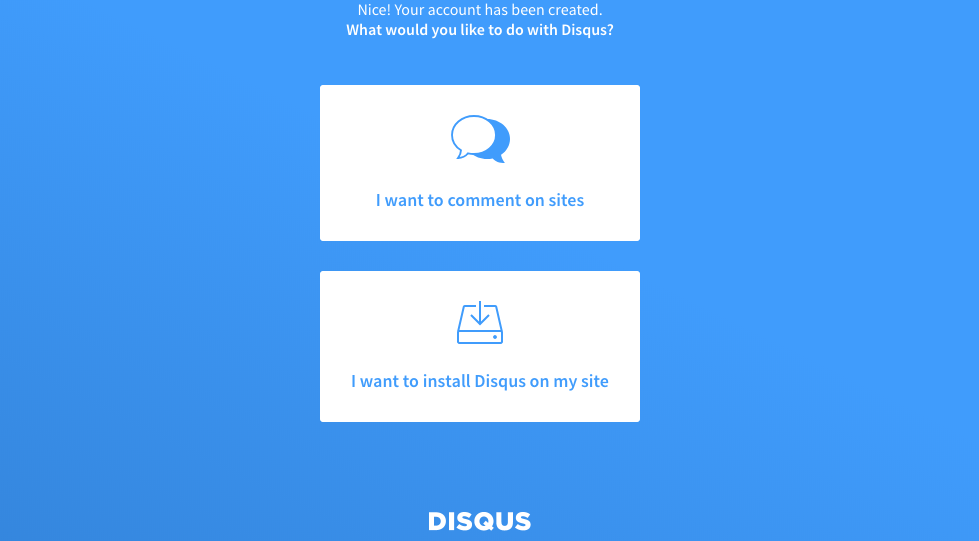
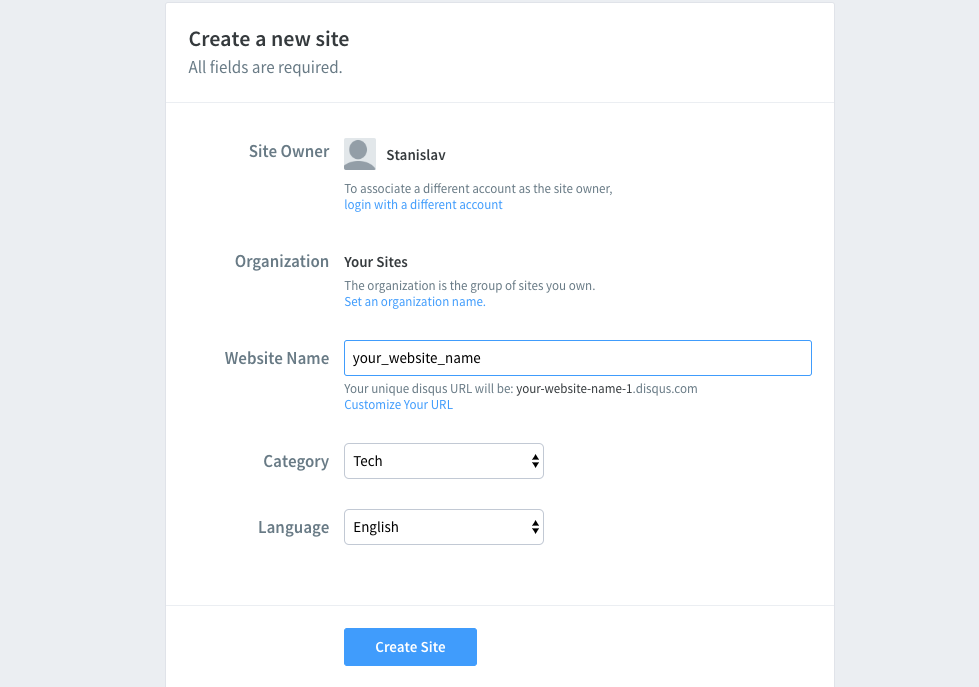
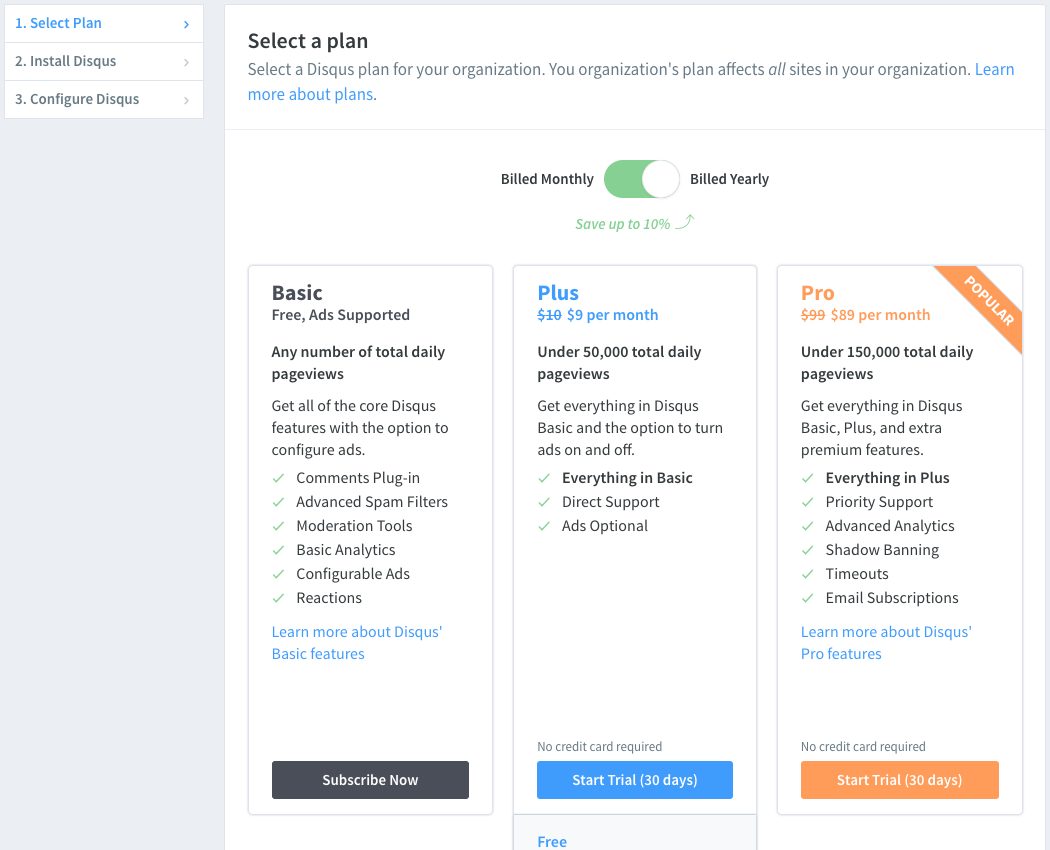
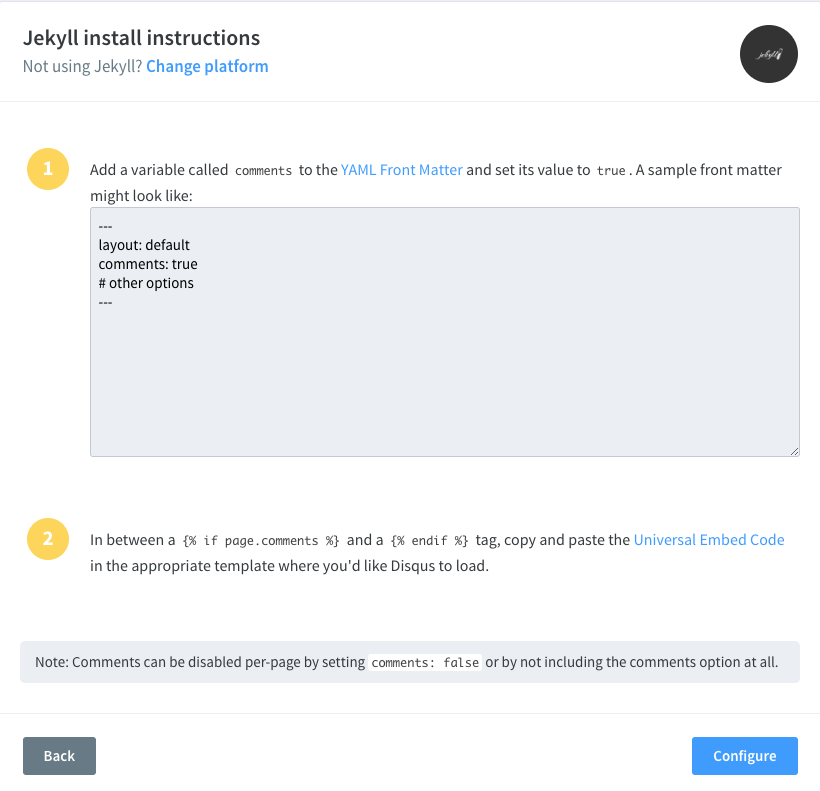
All you need to do is:
- create an account on Discus website
- click on get started button
- click on "I want to install Disqus on my site"
- give the name to your website - it can be any name you want to associate your site within disqus
- choose your financial plan you want to get
- choose your platform (in our case it is Jekyll)

- copy the script to embed in your website
How to enable comments on your website (updated 2019-04-21)
(UPDATE) Previously I described manual steps how to enable comments on your website, but as found
out with
the help of a friend there is already built-in functionality for comments in minimal mistakes
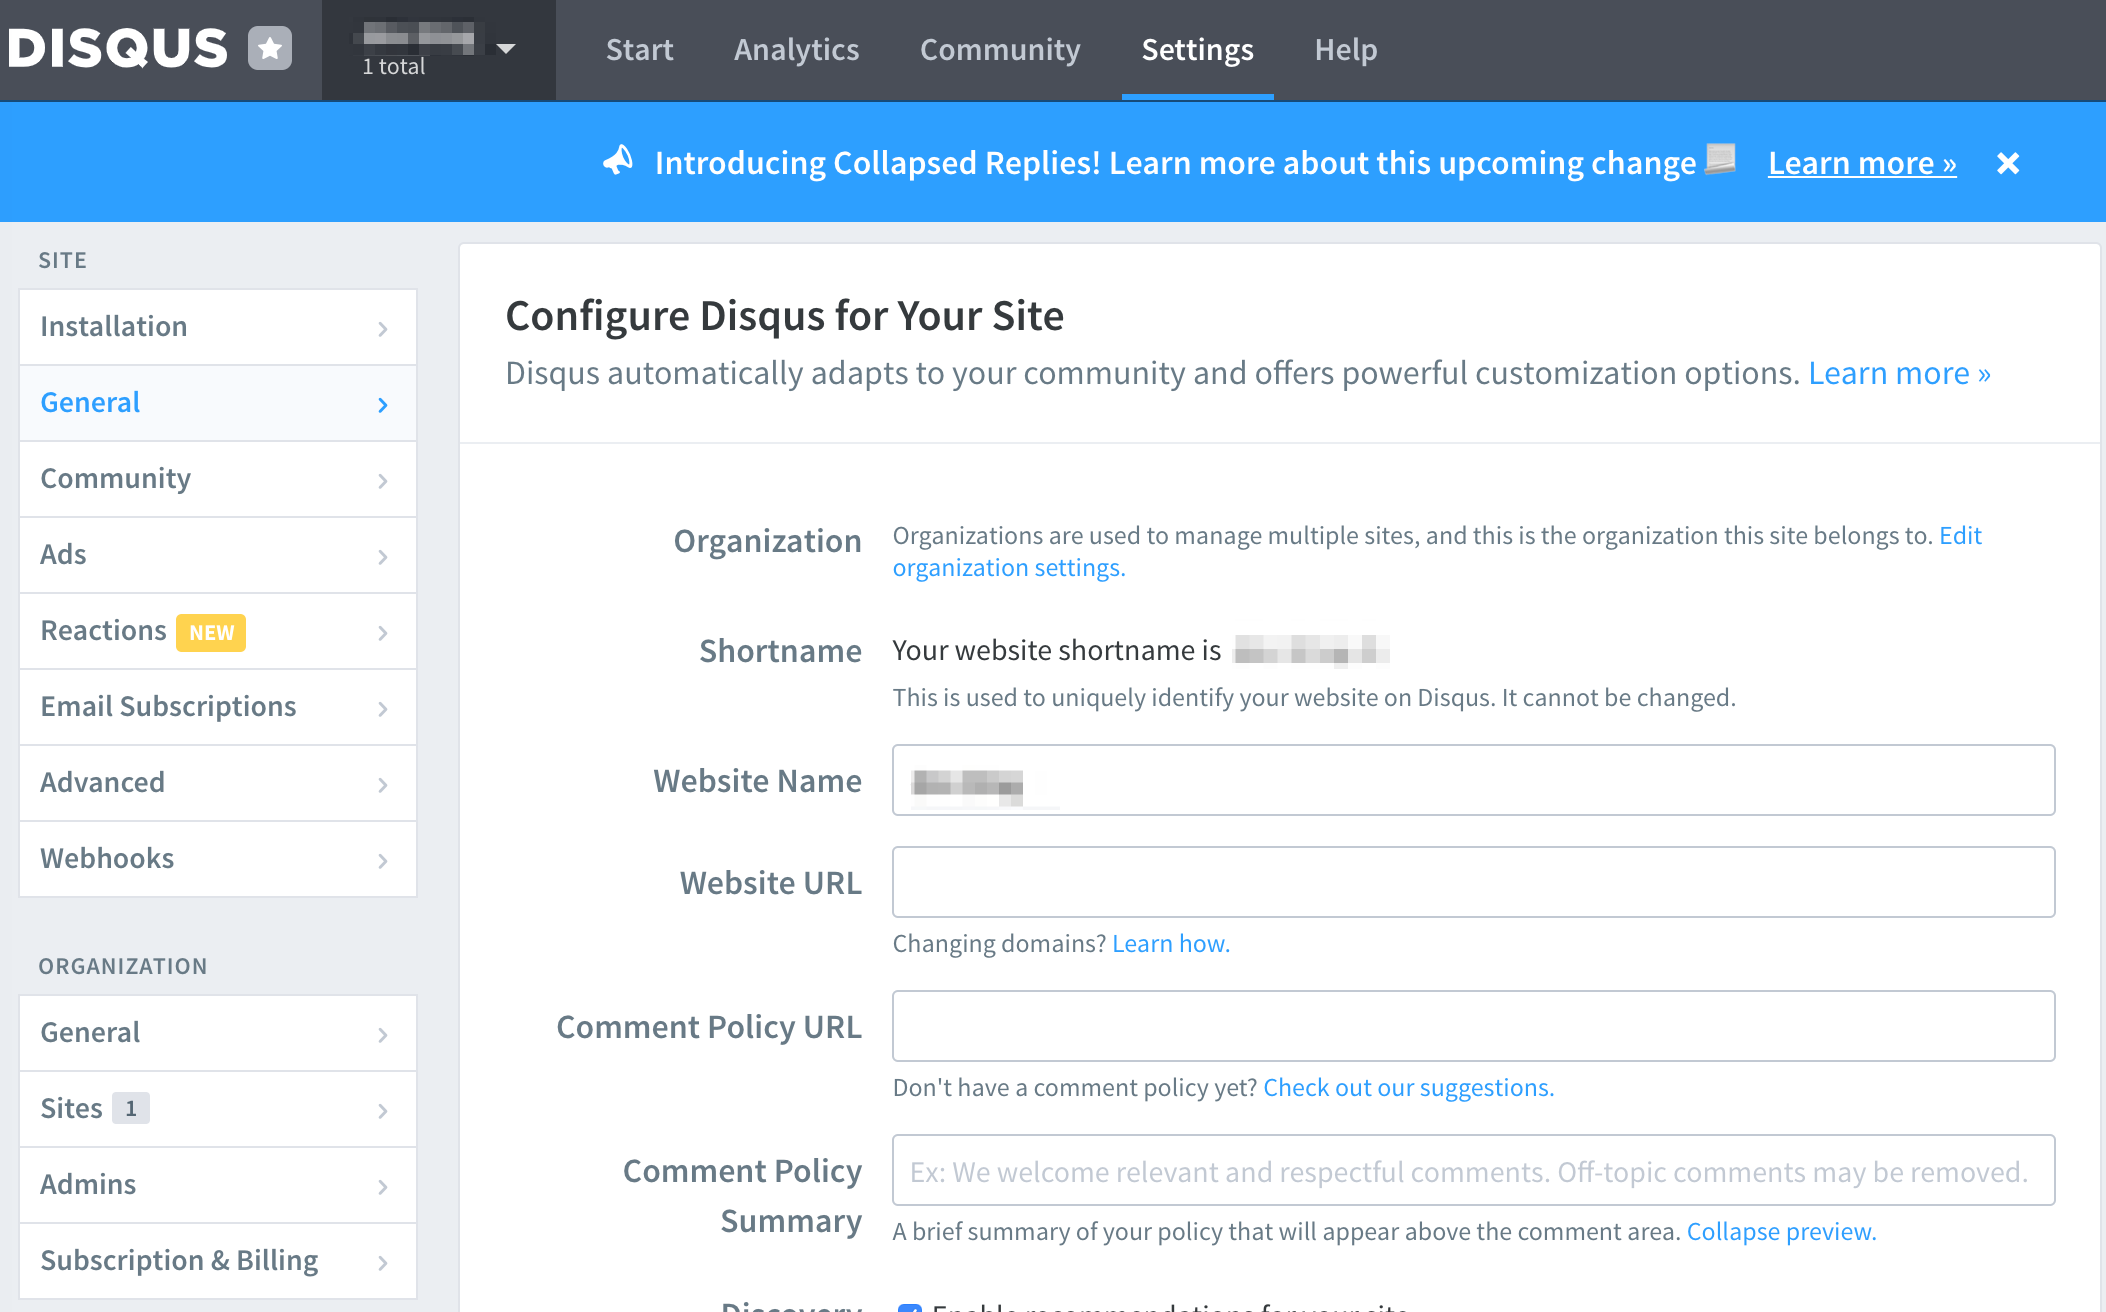
template. To enable it all you need to do is to add this lines to your _config.yml:
comments:
  provider: "disqus"
  disqus:
    shortname: "your_site_short_name_from_disqus"
The short name can be found on your disqus webpage:
And remember that comments section will be enabled only when we build our jekyll website with
environment vairable JEKYLL_ENV set to production.
The rest of the article is useful as en example how you can customize minimal mistakes template
to make it fit to your needs.
In order to enable comments we have to edit layout that is used for posts (or any other layout to
which you want to add comments) in order to include comments session. In my case I am using
single layout that why I will edit it's html file.

It might be that you don't have this _layouts folder at all as well as file for template like
single.html: in this case all you have to do is: create _layouts folder by yourself in the
root directory, then find the repository of you jekyll template and download files from
_layouts folder to your newly created one.
Overriding template defaults
Be aware that when you create a copy of template's files in your project directory - exactly
these files will be used in your project and not the default files. It means that you will
override files in your project and you can modify them to achieve what ever you want. In our case
we want to add comments, that's why I added next part to single.html file.
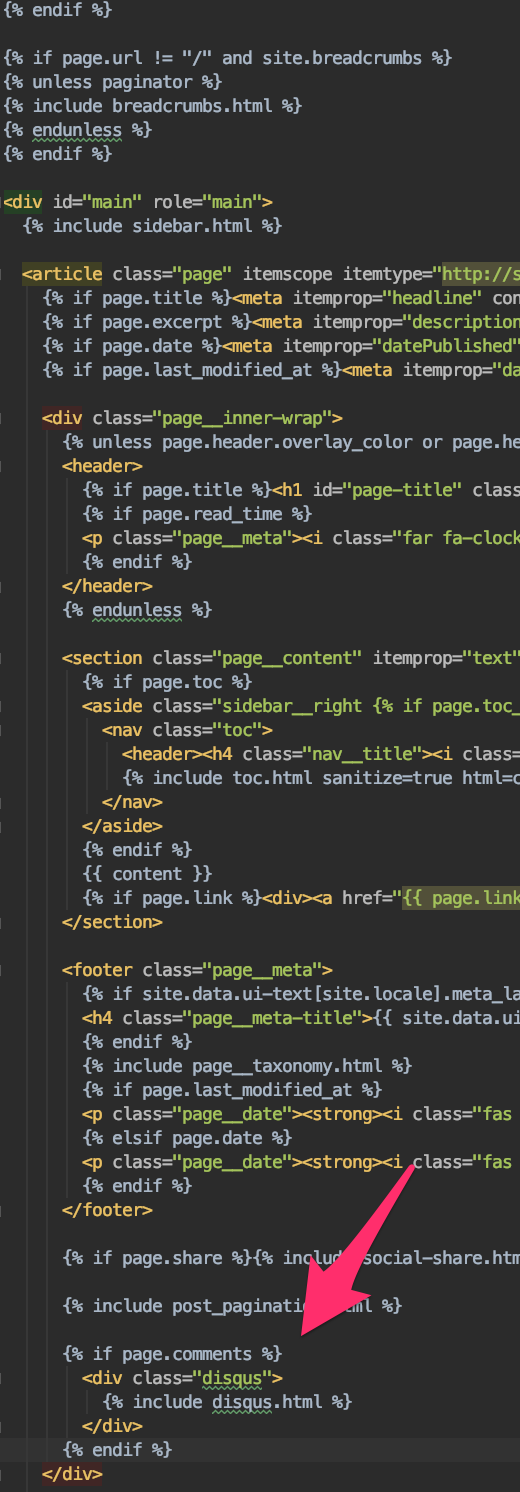
By doing this we override the single layout and from now on it will include comments section.
If you take a closer look at the code excerpt above you will notice a few moments:
- if statement which checks whether comments are enabled or not:
if page.comments
Later on this flag will be used in our pages to switch on/off our comments section.
- include statement which references the
disqus.htmlfile
include disqus.html
This file contains the actual script that will make comments section live. We can put this script
right here in single.html file, but I like to have it as a separate file because it will be
easier to handle changes if needed. This disqus.html file has to be added to _includes folder
(and again if you don't have - just create it). So go ahead and create disqus.html file inside
_includes folder.
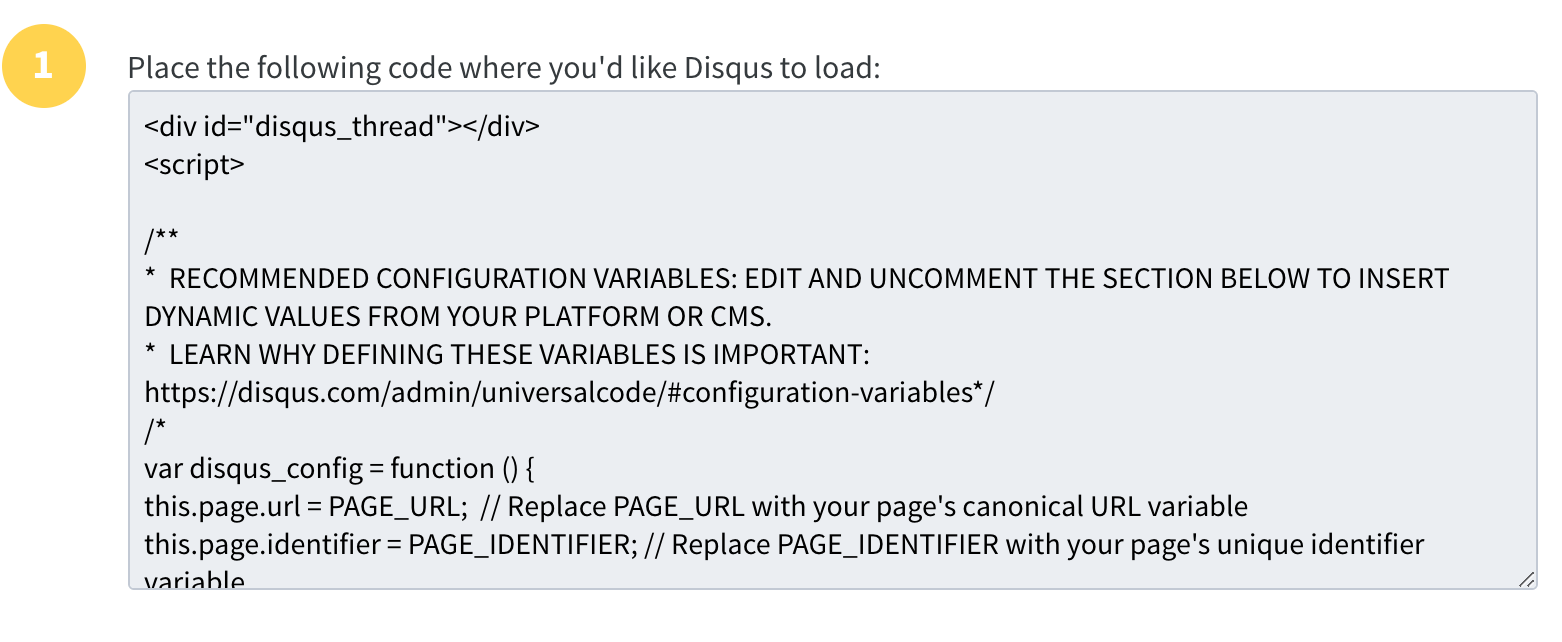
Now we have to copy and paste the script that is already created by disqus into disqus.html.
So you can use this link to go to the description section
or just go futher with in you disqus page and click here:
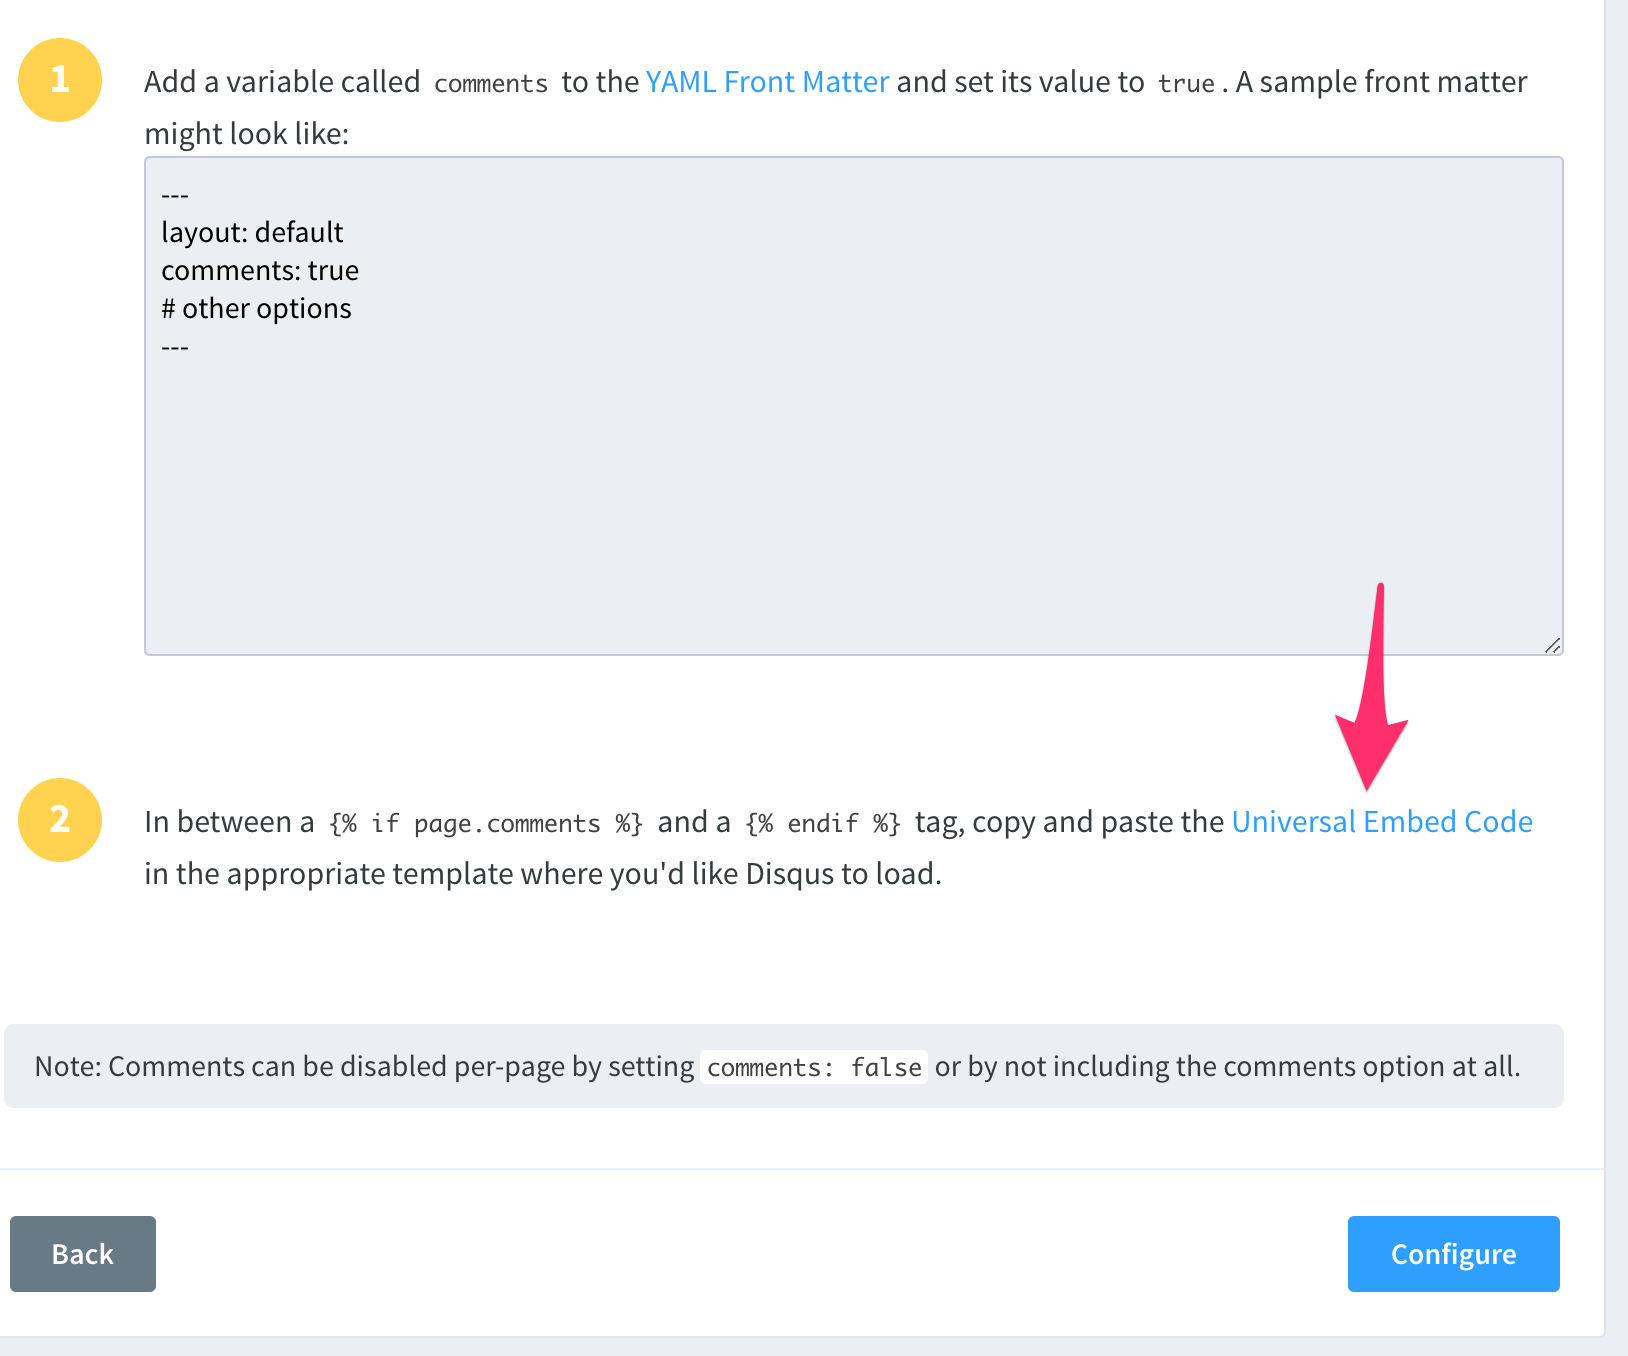 Then you will see a page with the snippet of the actual script you need to paste in
 disqus.html.
The next and final step is enabling comments in our specific page:
- let's go to
_postsfolder:
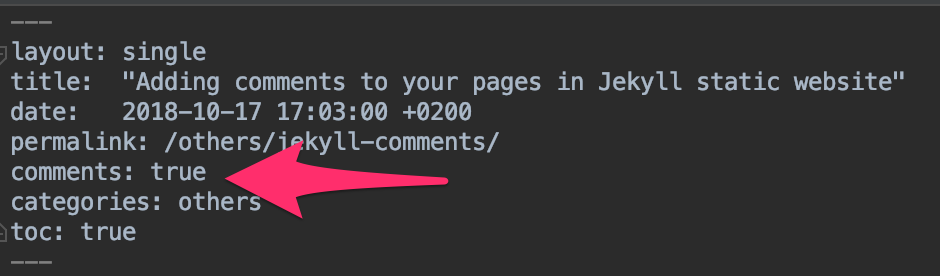
- enable the comments flag in the page:
The last stage: just restart your jekyll serve if it wasn't started yet and check the results.
Other way is to include script directly to the page
The other way to do the same is to copy paste script directly to your page, but then you need to do this on each page you want to add comments to. Approach above is more robust.
Problems I faced
Of course there were some problems.
Where should we get page url, id and why do we need them
One of such problems is getting the right url and id to provide them to disqus script.
First of all why do we need them: they specify the thread of discussion in disqus platform. It
means that using these values disqus knows where to find comments specifically for this page. You
can find full explanation here
I use these lines to set those variables:
  this.page.url = 'site.url site.baseurl page.url';
  this.page.identifier = 'page.id';
But without spaces and with curly braces. Sorry, can't put them here because Jekyll replaces them with the value of variable.
Conclusion
Setting comments to your static website is pretty easy and there are several options to achieve this. As always I hope this article was useful for you.